Roku Projector Setup and How to Build a Budget Home Cinema in 2026
Why a Projector Delivers the Best Entertainment Value Per Dollar in 2026
Walk into any electronics retailer and price a seventy-five-inch flat-panel television. The number on the tag instantly eliminates that screen size from consideration for most budget-conscious households. Step up to an eighty-five-inch model and the price climbs further into territory that feels irresponsible for an entertainment purchase. Now consider that a hundred-inch projected image, dramatically larger than either of those television options, can be achieved with hardware costing between one hundred and three hundred dollars.
The economics of projection technology have shifted dramatically in recent years as LED light source engineering has matured and manufacturing volumes have driven component costs downward. Modern budget projectors deliver bright, colorful, high-resolution images at price points that were unthinkable even three years ago. A roku projector setup leveraging this affordable hardware creates a genuine home cinema experience that transforms movie nights, sports viewing parties, and gaming sessions into immersive large-format events.
For cord-cutters already committed to minimizing monthly entertainment expenses, combining an affordable projector with a compact Roku streaming device represents one of the smartest investments available. The one-time hardware purchase delivers a cinematic screen size that makes every piece of streaming content feel exponentially more engaging, from blockbuster action films to championship sporting events to nature documentaries with breathtaking landscape cinematography.
Built-In Roku Projectors versus Streaming Stick and Projector Combinations
The current marketplace offers two distinct approaches to building a Roku-powered projection system. Understanding the advantages and trade-offs of each approach ensures you select the configuration that best matches your household priorities.
The first approach is purchasing a projector with the Roku operating system pre-installed directly into the hardware. These all-in-one devices boot directly into the familiar Roku home screen interface projected onto your wall or screen surface. The streaming platform is embedded into the projector firmware, meaning you navigate channels, install applications, and manage settings using the included Roku remote without any external device connected. This integrated approach minimizes cable clutter, simplifies setup, and reduces total component count to a single piece of hardware.
The second approach is pairing any standard HDMI-equipped projector with an external Roku streaming stick. This modular configuration provides greater flexibility because you can upgrade either component independently. If a faster streaming device launches next year, swap the stick without replacing the projector. If a brighter, higher-resolution projector becomes available at an attractive price, upgrade the projection hardware while keeping your existing streaming device with all installed channels and saved preferences intact. For budget shoppers frequently browsing retailer clearance sections for roku projector deals, the modular approach often delivers superior overall value.
Choosing the Right Projector Specifications for Streaming Entertainment
Projector specification sheets list dozens of technical parameters that overwhelm first-time buyers. For streaming entertainment purposes, only four specifications meaningfully impact your daily viewing experience.
The first critical specification is native resolution. For streaming content in 2026, a projector with native 1080p full HD resolution delivers excellent detail at screen sizes up to one hundred and twenty inches. Budget models advertising 4K support often achieve this through pixel-shifting technology rather than true native 4K panels, but even pixel-shifted resolution enhancement produces noticeably sharper images compared to native 1080p at very large projection sizes.
The second specification is brightness measured in lumens. A minimum rating of 2000 lumens produces acceptable images in a darkened room with blackout curtains. Projectors rated between 3000 and 4000 lumens maintain watchable image quality in rooms with moderate ambient light, such as a living room with partially covered windows during evening hours. Higher lumen counts cost more but provide critical flexibility for rooms that cannot achieve total darkness.
The third specification is contrast ratio, which determines how deep the black levels appear in dark scenes. Higher contrast ratios produce more cinematic images with visible shadow detail rather than washed-out gray tones in dark sequences. A contrast ratio of 3000 to 1 or higher delivers satisfying movie viewing performance.
The fourth specification is throw distance, which determines how far the projector must sit from the wall to produce your desired image size. Standard throw projectors require eight to twelve feet of distance for a hundred-inch image. Short throw models achieve the same size from three to five feet, essential for smaller rooms where traditional placement distances are physically impossible.
Step by Step Physical Setup and Room Optimization
Transforming a standard living room, bedroom, or basement into a functional home cinema projection space requires minimal effort and zero permanent modifications to your home.
- Step 1 Select Your Projection Surface
- Choose a clean, flat wall section free from picture frames, shelving, and textured wallpaper. White or light gray paint produces the best results. For improved image quality, a portable pull-down projection screen ranging from eighty to one hundred and twenty inches costs between thirty and eighty dollars and dramatically enhances brightness uniformity and color accuracy.
- Step 2 Position the Projector at the Correct Distance
- Consult your projector's throw ratio chart to determine the optimal placement distance for your desired screen size. Most standard throw projectors produce a hundred-inch image from approximately eight to ten feet away. Place the projector on a stable table, shelf, or ceiling mount aligned perpendicular to the projection surface.
- Step 3 Connect Your Streaming Device
- Plug your Roku streaming stick into an available HDMI port on the projector. Connect the streaming device power adapter to a nearby outlet or to the projector's USB power port if one is available. For built-in Roku projectors, skip this step as the streaming platform is already integrated.
- Step 4 Control Ambient Light
- Close curtains, lower blinds, and turn off overhead room lighting. The darker you can make the room, the more vivid and contrasty your projected image will appear. Even budget projectors produce stunning images in properly darkened environments.
- Step 5 Adjust Focus and Keystone
- Use the projector's manual or motorized focus wheel to sharpen the image until text and fine details appear crisp. If the projector is angled slightly off-center from the screen, use the keystone correction feature to square the image geometry.
Solving the Audio Challenge for Projected Entertainment
The single most significant compromise in most projector setups compared to modern flat-panel televisions is audio quality. Budget projectors include built-in speakers that produce thin, tinny sound barely adequate for dialogue comprehension and completely insufficient for immersive movie or sports viewing. Even premium projectors prioritize optical engineering over audio hardware, resulting in speaker systems that function as a basic fallback rather than a satisfying primary audio source.
The simplest solution is connecting a portable Bluetooth speaker to your Roku streaming device. Modern wireless speakers costing between thirty and seventy dollars deliver rich, room-filling audio with legitimate bass response that transforms the projected viewing experience from a visual novelty into a genuinely immersive cinematic event. Place the speaker directly below the projection surface at ear level for optimal sound staging.
For households seeking a more permanent installation, a compact soundbar positioned beneath the projection screen delivers superior audio separation, wider stereo imaging, and dedicated dialogue clarity channels that wireless portable speakers cannot match. Soundbar connections run through the projector's audio output, HDMI ARC port, or through a direct Bluetooth pairing to the streaming device, depending on your specific hardware configuration.
Outdoor Movie Night Setup Using Portable Projection Hardware
One of the most delightful applications of a roku projector configuration is the backyard outdoor movie night. During warm weather months, portable projection hardware transforms any outdoor space into an open-air cinema that families and friends genuinely love.
The equipment requirements for outdoor projection are surprisingly modest. A portable projector with at least 3000 lumens brightness handles the ambient light conditions present during dusk and early evening hours. A foldable outdoor projection screen or a clean white bedsheet hung between two support points provides the display surface. A portable Bluetooth speaker delivers wirelessly transmitted audio that reaches every blanket and lawn chair across the viewing area.
Power your Roku streaming device through a standard outdoor extension cord running to the nearest exterior outlet, or use a high-capacity portable power station if no outlets are accessible in your outdoor space. Connect the streaming device to your home WiFi network, which most modern routers broadcast with sufficient range to cover standard backyard distances. If WiFi signal drops at your projected viewing location, a simple WiFi range extender positioned near a window facing the outdoor area bridges the coverage gap.
The total additional equipment cost for outdoor projection beyond your existing indoor setup amounts to roughly fifty to eighty dollars for a portable screen and extension cable. The memories created during backyard movie nights under the stars with projected entertainment spanning a hundred inches across your yard deliver entertainment value that no indoor setup of any price can replicate.
Streaming Live Sports and Movies on a Giant Projected Screen
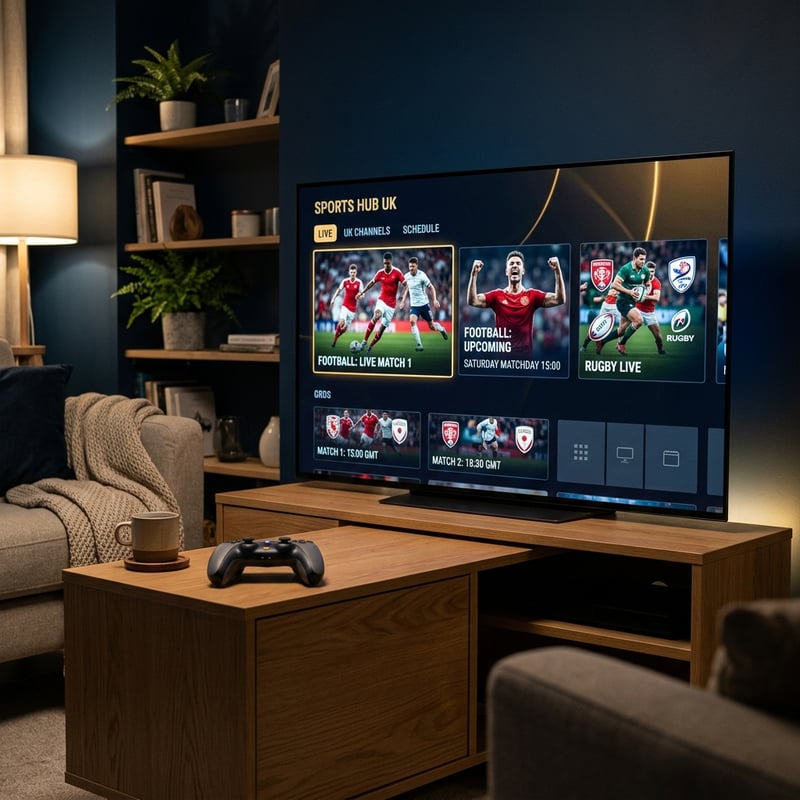
Watching sports on a hundred-inch projected display fundamentally changes the emotional intensity of live athletic competition. Every diving catch, every breakaway sprint, and every last-second score unfolds across a screen size that envelops your peripheral vision and creates a visceral sense of presence that standard television displays simply cannot generate.
For sports viewing, configure your projector to its highest brightness mode to maintain vivid color saturation during fast-motion sequences. Enable game mode or low-latency mode if your projector offers these options, as they minimize input processing delay that can cause the projected image to trail slightly behind the real-time audio feed. Set your Roku streaming application to the highest available video quality setting and ensure your internet connection sustains at least twenty megabits per second of uninterrupted downstream bandwidth for fluid sixty-frame-per-second sports playback.
Movie nights benefit from the projector's cinema mode or film mode setting, which prioritizes accurate color reproduction and smooth twenty-four-frame-per-second playback over maximum brightness. Dim the room completely, activate your external audio system at a comfortable volume level, and experience streaming entertainment the way filmmakers intended it to be seen: projected large across a darkened room with audience attention fully absorbed by the massive visual canvas filling the wall from edge to edge.
Complete Budget Breakdown for Every Home Cinema Configuration
Building a complete Roku-powered home cinema projection system requires a remarkably modest financial investment, especially when compared to purchasing a large-format flat-panel television delivering a comparable visual experience.
The ultra-budget configuration pairs a capable 1080p projector at one hundred to one hundred and fifty dollars with an existing Roku streaming stick and a blank white wall as the projection surface. Add a thirty-dollar portable Bluetooth speaker for audio, and the complete system delivers an eighty-to-hundred-inch cinema experience for under two hundred dollars total. This configuration produces stunning results in a properly darkened room and rivals the visual impact of television displays costing five to ten times more.
The mid-range configuration upgrades to a higher-brightness projector at two hundred to three hundred dollars, adds a portable pull-down projection screen at fifty to seventy dollars, and includes a compact soundbar at eighty to one hundred dollars for improved audio fidelity. Total investment reaches approximately four hundred to five hundred dollars for a complete system delivering vivid hundred-and-twenty-inch images with rich, room-filling sound.
At either price tier, the roku projector approach delivers the largest, most immersive viewing experience available to budget-conscious cord-cutters. The per-square-inch cost of a projected image undercuts flat-panel television pricing by an enormous margin, making projection the undisputed champion of value-driven home entertainment for households willing to embrace the simple joy of a darkened room and a massive wall of light.
Frequently Asked Questions
Ready to get started?
Try our service risk-free with a 24-hour free trial.
Related Articles
How Much is IPTV? A Comprehensive Guide to Costs and Plans
Explore IPTV costs and the best subscription options.
IPTV on Roku Setup Guide Best Apps and How to Watch in 2026
Roku does not support sideloading like Firestick but you can still watch IPTV on it. This guide covers every working method in 2026 including dedicated Roku IPTV player apps from the Channel Store, M3U playlist players, screen mirroring from your phone, and the web browser workaround. We also explain when it makes more sense to pair your Roku with a secondary device instead.
Discover the Best IPTV UK Subscriptions for 2026: Reviews & Tips
Uncover the best IPTV subscriptions available in the UK for 2026.