
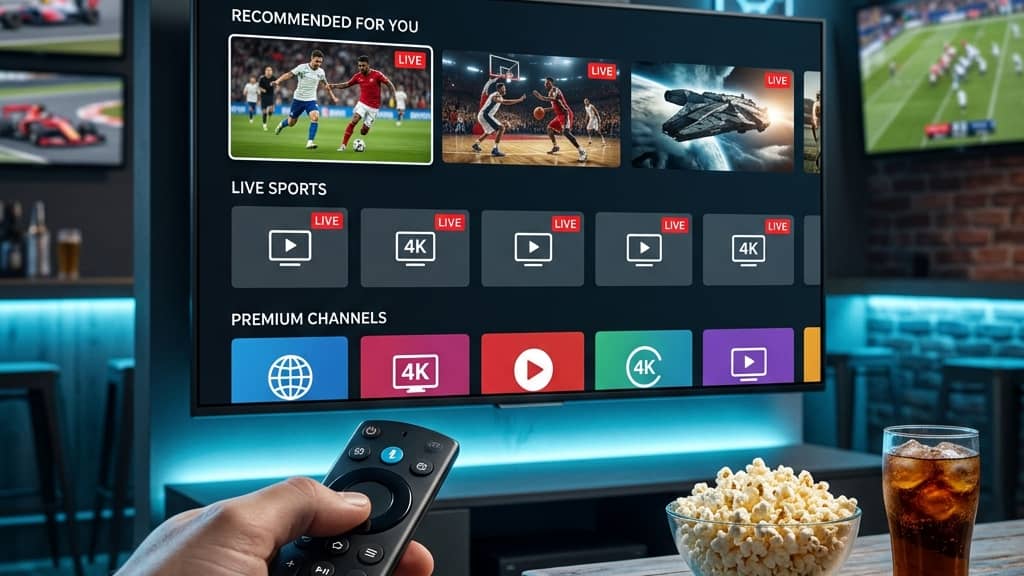
How to Set Up IPTV: A Comprehensive 2026 Guide

Paying a fortune for a cable subscription that cuts out during the big game, hides your favorite channels behind expensive add-on packages, and still somehow manages to buffer — that is the frustration that drives millions of people to search for a better way. IPTV is that better way, and once you know how to set up IPTV correctly the first time, you will wonder why you ever tolerated the old system. The problem is that most guides online skip the critical details — the exact settings, the right app choices, the network tweaks — and you end up staring at a spinning loading wheel instead of your favorite content. This guide fixes that. Whether you are using a Firestick, an Android TV box, or a Smart TV, every step you need is right here.
Getting your IPTV setup right is not just about convenience — it is about protecting the money you spend on your subscription. A misconfigured app or a weak network connection will cause constant buffering, EPG (Electronic Programme Guide) failures, and dropped streams, which wastes every penny of that subscription. Taking twenty minutes to configure things properly now saves hours of frustration later.
Core Concepts & Need-To-Know Info
- M3U Playlist / M3U URL: This is a text file or web link that contains the list of all your IPTV channels. Your provider gives you this URL when you subscribe. It looks something like http://yourprovider.com:8080/get.php?username=xxx&password=xxx&type=m3u_plus.
- Xtream Codes API: An alternative login method to M3U. Instead of a single URL, you enter a server address, username, and password separately. Most premium providers support both formats.
- EPG (Electronic Programme Guide): The TV guide that shows what is currently on and what is scheduled. Your provider usually supplies an EPG URL alongside your M3U link.
- VOD (Video On Demand): The movies and TV series section of your IPTV service, separate from live channels.
- Buffering causes: The most common culprits are slow internet, ISP throttling, an overloaded server from your provider, or incorrect app buffer settings.
- Minimum internet speed: 10 Mbps for HD streams, 25 Mbps for 4K, and a stable connection matters more than raw speed. Wired ethernet always beats Wi-Fi for IPTV.
- IPTV Apps: You need a third-party player. TiviMate, IPTV Smarters Pro, and GSE Smart IPTV are the most reliable options available today.
Step-by-Step Guide
- Step 1: Enable Apps from Unknown Sources on Firestick:
- Go to your Firestick home screen and select Settings from the top menu. Navigate to My Fire TV, then tap Developer Options. Toggle Apps from Unknown Sources to ON. This allows you to install IPTV apps that are not listed in the Amazon App Store. Without this step, nothing else in this guide will work.
- Step 2: Install the Downloader App:
- Return to the Firestick home screen and open the Find section, then select Search. Type Downloader and install the orange Downloader app by AFTVnews. This is the browser and download tool that lets you sideload IPTV apps onto your device. Open Downloader after installation and allow it any permissions it requests.
- Step 3: Download and Install TiviMate (Recommended App):
- Inside the Downloader app, tap the URL bar at the top and type https://tivimate.com or search for a direct APK link from a trusted IPTV community. Alternatively, search TiviMate directly in the Amazon App Store — it is available there as a companion app. For Android TV boxes, open the Google Play Store and install TiviMate directly. Once installed, open the app.
- Step 4: Add Your IPTV Playlist:
- When TiviMate opens for the first time, tap Add Playlist. You will see two options — M3U Playlist or Xtream Codes. If your provider gave you a single long URL, choose M3U Playlist and paste your URL into the field. If they gave you a server address, username, and password, choose Xtream Codes and enter each field separately. Tap Next to load your channel list. This may take 30 to 90 seconds depending on how large your provider's channel library is.
- Step 5: Add Your EPG URL:
- After your playlist loads, TiviMate will prompt you to add an EPG source. Paste the EPG URL your provider supplied (it usually ends in /xmltv.php for Xtream-based providers). Tap Finish. The app will download and match programme guide data to your channels. If EPG does not load immediately, go to Settings, then Playlist, then EPG and tap Update EPG manually.
- Step 6: Organize Your Channel Groups:
- Inside TiviMate, go to Settings, then Playlist and tap Select Groups. Here you will see every channel category your provider offers — Sports, Movies, UK channels, US channels, international packages, VOD, etc. Deselect any groups you do not need. This keeps the app fast and makes navigation clean. Enable only the groups you actually watch.
- Step 7: Test Your Streams and Adjust Buffer Settings:
- Navigate to any live channel and let it play for 60 seconds. If it plays smoothly, you are done. If you notice stuttering, go to Settings, then Player, then Video Buffer and increase it from the default (usually 1000ms) up to 3000ms to 5000ms. This gives the app more data to pre-load before playing, which eliminates most buffering caused by minor network fluctuations.

Imagine this scenario: you have set everything up, the big match kicks off, and suddenly every channel buffers every 30 seconds. You restart the app, reboot the Firestick, nothing works. Nine times out of ten this is either ISP throttling kicking in during peak hours or your provider's server being overloaded because everyone is watching the same event. Having a VPN configured and a backup provider as a contingency plan prevents this from ruining your experience entirely. These are not hypothetical problems — they happen to real users every single weekend.
Best VPNs to Stop ISP Throttling
ISP throttling is one of the most overlooked problems in the IPTV world, and a quality VPN solves it by encrypting your traffic so your internet provider cannot identify and slow down your streaming data.
- ExpressVPN: The fastest option for streaming, with servers optimized specifically for video traffic. Works seamlessly on Firestick via its native Fire TV app. Slightly more expensive but worth it for zero-buffer performance.
- NordVPN: Excellent balance of speed and price. NordVPN's NordLynx protocol delivers speeds fast enough for 4K IPTV streams without noticeable lag. Also has a native Firestick app.
- Surfshark: The best value option, especially if you have multiple devices. Unlimited simultaneous connections means you can protect your Firestick, phone, tablet, and laptop all under one affordable subscription.
- Always connect to a server close to your IPTV provider's server location — This reduces the distance your data travels and keeps speeds high. If your provider is UK-based, a UK VPN server is ideal.
- Enable the VPN kill switch — This prevents your real IP from leaking if the VPN connection drops briefly, which protects both your privacy and your stream stability.
TiviMate vs IPTV Smarters Pro: Which App Should You Use?
Both apps are excellent, but they serve slightly different users. Here is how to decide which one is right for your setup.
- TiviMate is the gold standard for Firestick and Android TV. Its interface is clean, the EPG integration is flawless, and the buffer controls are more granular than any competing app. The free version is functional but TiviMate Premium (a one-time purchase or annual subscription) unlocks multi-playlist support, catchup TV, and recording features. If you are serious about IPTV, this is your app.
- IPTV Smarters Pro is the better choice for beginners or users who want a more familiar TV-style layout. It supports both M3U and Xtream Codes, loads quickly, and has a built-in video player that handles most stream formats without additional configuration.
- GSE Smart IPTV is worth knowing about as a backup. It handles unusual M3U playlist formats that occasionally trip up TiviMate and Smarters, making it a useful troubleshooting tool when a new provider's playlist behaves unexpectedly.
- For 4K content specifically, TiviMate's integration with the ExoPlayer and MX Player external players gives it an edge in handling high-bitrate streams that the built-in player sometimes struggles with.
Network Requirements for 4K Streaming Without Buffering
Your IPTV service is only as good as the connection feeding it. These are the real-world network requirements that make the difference between smooth 4K and unwatchable buffering.
- Minimum 25 Mbps dedicated to your streaming device for a single 4K stream. Run a speed test at fast.com directly on your Firestick (not your phone) to get an accurate reading of what your device actually receives.
- Use a wired ethernet connection wherever possible — For Firestick, use the official Amazon Ethernet Adapter (around $15) to connect directly to your router. This single change eliminates the majority of Wi-Fi related buffering issues.
- If Wi-Fi is unavoidable, position your router in the same room as your TV or invest in a Wi-Fi 6 mesh network system. Keep your Firestick on the 5GHz band, not the 2.4GHz band, for faster and less congested speeds.
- Restart your router weekly — Routers accumulate connection logs and cached data that gradually slow down throughput. A weekly reboot takes 60 seconds and noticeably improves streaming stability.
- QoS (Quality of Service) settings on your router — Log into your router admin panel and prioritize your streaming device's MAC address. This ensures your Firestick gets bandwidth first, even when other household devices are active.
Common Setup Mistakes and How to Fix Them
Even experienced users make these errors. Knowing them in advance saves you hours of troubleshooting.
- Mistake: EPG shows no programme guide data — Fix: Confirm your EPG URL is correctly formatted and active. In TiviMate go to Settings, then Playlist, then Update EPG. If it still fails, ask your provider for a fresh EPG URL as these occasionally change after server updates.
- Mistake: Channels load but show a black screen with audio — Fix: Change your video player. In TiviMate go to Settings, then Player and switch from Auto to ExoPlayer or vice versa. A black screen with audio almost always means a codec mismatch between the stream format and your default player.
- Mistake: Playlist loads but shows zero channels — Fix: Your M3U URL has either expired, contains a typo, or your subscription has lapsed. Copy the URL fresh from your provider portal and re-enter it. Do not type it manually.
- Mistake: App crashes when switching channels rapidly — Fix: Clear the app's cache. On Firestick go to Settings, then Applications, then Manage Installed Applications, then TiviMate, then Clear Cache. Do this monthly as standard maintenance.
- Mistake: Some channels buffer while others work fine — Fix: This is almost always a server-side issue where specific channel streams are hosted on a different, more congested server node. Contact your provider and ask them to move those channels to a faster node, or check if your provider has a backup server URL.
Learning how to set up IPTV properly is genuinely a one-time investment of effort that pays off every single day you sit down to watch television. With TiviMate installed, your M3U playlist loaded, a reliable VPN running in the background, and your network dialed in with the settings covered in this guide, you have a streaming setup that outperforms most people's expensive cable packages in every measurable way. Take it one step at a time and visit our channel list and pricing plans to find the subscription that fits your needs perfectly.
Frequently Asked Questions
Ready to get started?
Try our service risk-free with a 24-hour free trial.
Related Articles
Understanding Why Is IPTV Not Working Today: Causes and Fixes
Learn why your IPTV might not be working today and how to fix it.

Discover the Best IPTV Services for Watching Ion Plus in 2026
Find the best IPTV services that stream Ion Plus effortlessly.
Is IPTV Legal in Canada? Understanding the Laws and Implications
Explore the legality of IPTV in Canada and safe streaming.